 Step-by-Step Guide to Set Domain to IIS:
Step 1: Install IIS (if not installed)
-
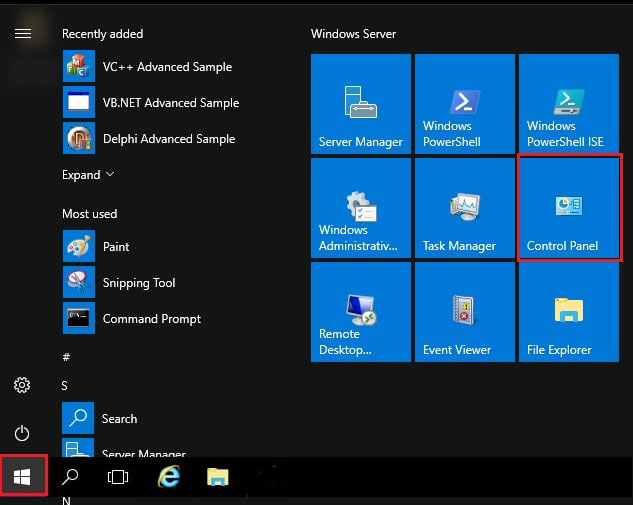
Open Server Manager
-
Click Add Roles and Features
-
Choose Role-based or feature-based installation
-
Select your server
-
Check Web Server (IIS) under Roles
-
Click Next and Install
Step 2: Add a Website in IIS
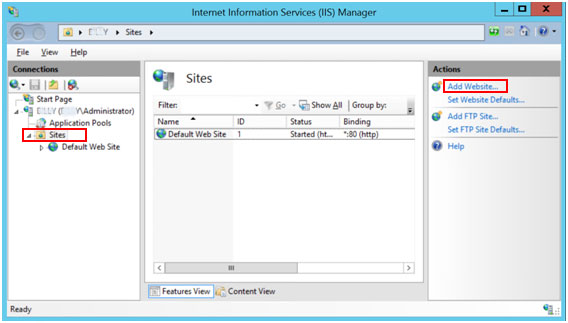
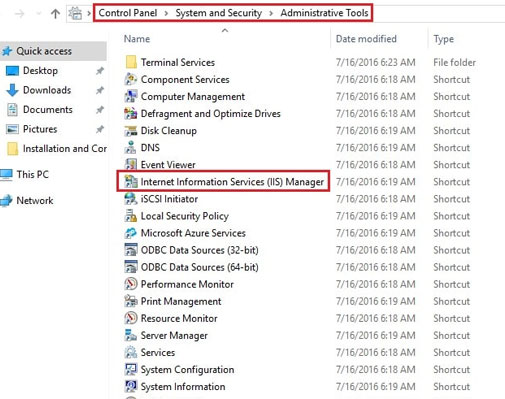
1. Open IIS Manager (inetmgr)

2. In the left panel, right-click Sites > click Add Website

3. Fill the form:
-
-
Site Name: Name for identification (e.g.,
MyWebsite) -
Physical Path: Folder where your website files (HTML/PHP/etc.) are stored (the site file that usually lies in inetpub folder.)
-
Binding:
-
Type:
http -
IP address: Select your server IP (or "All Unassigned")
-
Port: Usually
80 -
Host name: Enter your domain (e.g.,
yourdomain.com) (leave it blank if this is dedicated IP otherwise enter “www.yourdomain.com”.)
-
-
4. Click OK
Step 3: Point Your Domain to Server IP
You need to update DNS records with your domain registrar:
-
Log in to your domain registrar's control panel (e.g., Bluechipspace.com, GoDaddy)
-
Go to DNS Management / Zone Editor
-
Add or Edit an A Record:
-
Host:
@(or blank, depending on registrar) -
Points to: your server's public IP
-
-
Optional: Add a www record:
-
Host:
www -
Points to: same server IP
-
![]() DNS changes may take 5 minutes to 24 hours to propagate.
DNS changes may take 5 minutes to 24 hours to propagate.
Step 4: Enable Firewall Port (Port 80)
-
Open Windows Defender Firewall
-
Click Advanced Settings
-
Inbound Rules > New Rule
-
Choose Port
-
TCP > Specific Port:
80
-
-
Allow the connection > Finish
Step 5: Test in Browser
-
Open browser and go to
http://yourdomain.com -
If setup is correct, your site should load.
⚙ Optional: Set Up HTTPS (SSL Certificate)
For https:// access:
-
Buy or generate a free SSL (e.g., from Bluechipspace)
-
Import SSL into Windows using Certificates MMC
-
In IIS, go to your site > Bindings > Add:
-
Type:
https -
IP: your IP
-
Port:
443 -
SSL certificate: Select imported certificate
-
-
Save and restart site
✅ Summary:
| Task | Description |
|---|---|
| Add site in IIS | With domain in "Host name" |
| DNS configuration | A record pointing to server IP |
| Firewall config | Allow TCP port 80 and optionally 443 |
| Test access | Open domain in browser |
| (Optional) HTTPS setup | Install SSL certificate in IIS |

